Outlook Categories
Cleaning up Outlook with categories: You can use Outlook categories to optically sort your inbox and thereby have a better overview.
With categories, you can highlight your e-mails and appointments in color. The colors could be used for prioritization or to assign them to specific topics/people. You can search via category and filter or use rules to automatically manage them further.
1. Select the message.
Click on a message in your inbox that you'd like to categorize:

2. Open the category menu.
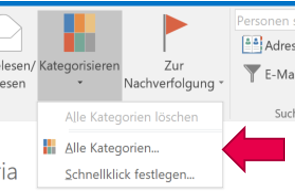
Click on the 'Categorize' button in the 'Start' menu ribbon, then on 'All Categories':

3. Create your own categories.
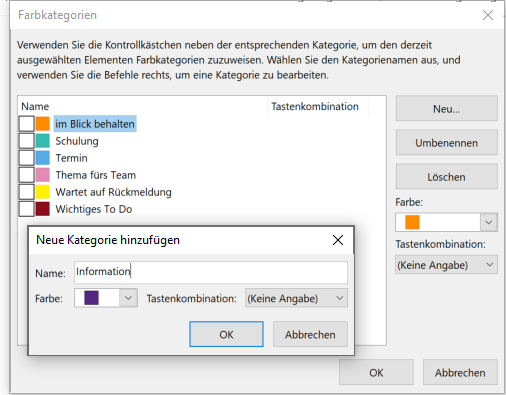
Click on the 'New...' button. A window will open. Name your category and select a color and optionally a key combination. For example, a traffic light system for prioritization is popular (red = important, amber = less urgent, green = no action needed). When done, click on 'OK':

4. Assign things to the category.
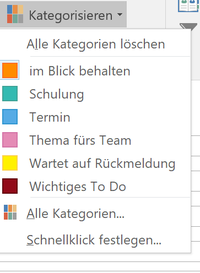
Now you can label your e-mails (and calendar entries) with the newly created categories. Simply mark the desired e-mail or calendar element, click on the menu ribbon 'Categorize' and select the right category (Tip: hold down [CTRL] to select several elements at once). Every element can be assigned to several categories:

5. Done—your mail has been categorized.
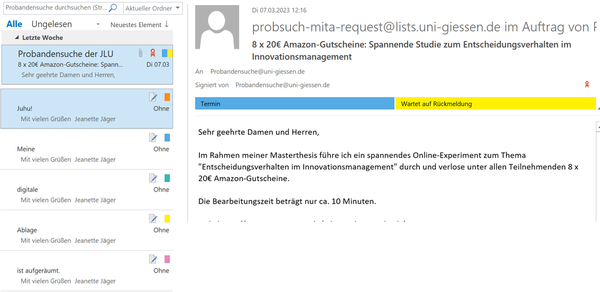
Your mailbox is now sorted into colors:

